Developer Tools (DevTools)
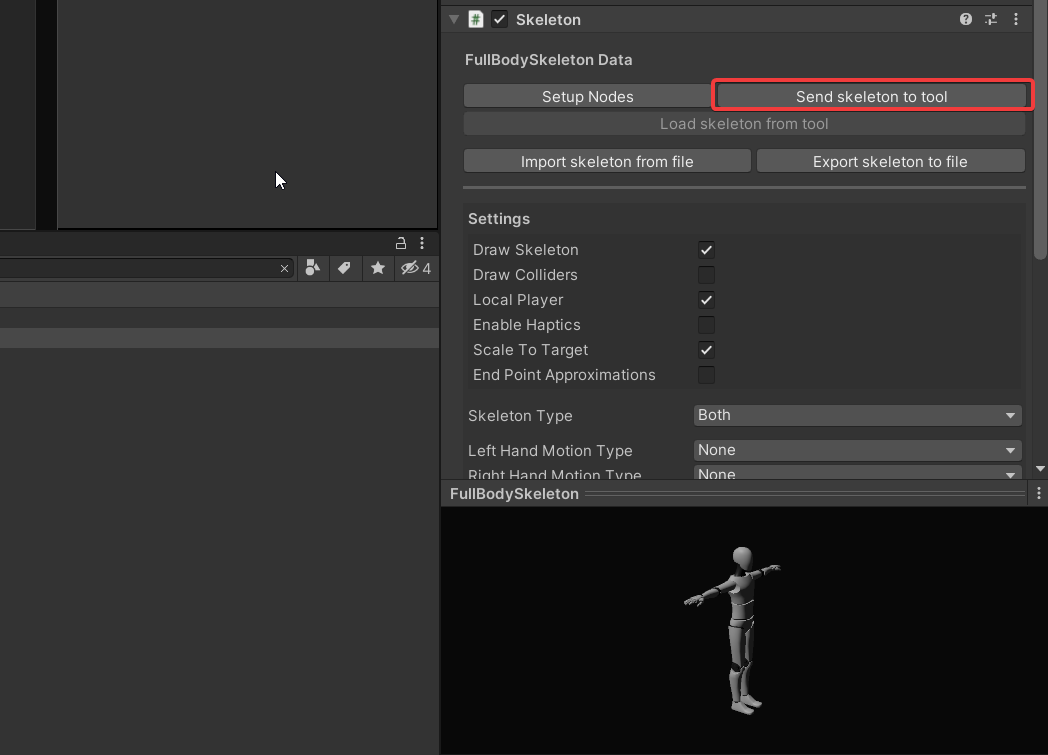
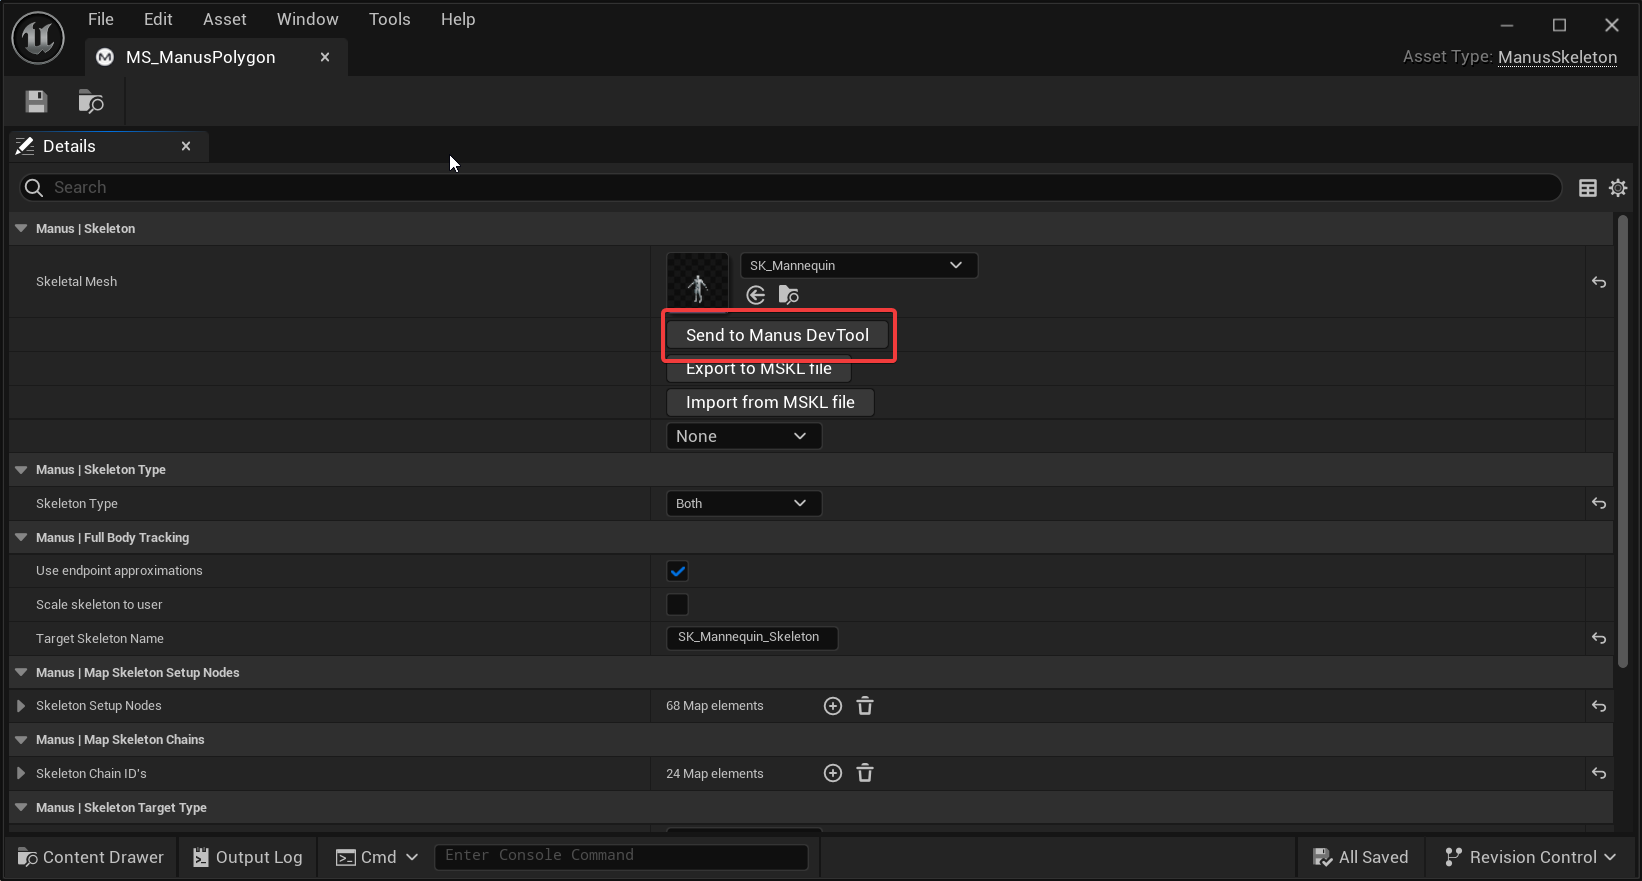
DevTools is our solution to help you prepare your models for use with our animator and retargeter. Models are sent to the tool from our Unreal and Unity plugins. Here you will define the skeleton by labeling the bones and creating chains. When you are done you either send the skeleton definition back to the plugin or you can export it as an mskl file and import it into your implementation manually.
Skeletons
It's hightly advised that you have a basic understanding of the MANUS Skeleton system before trying to set up a skeleton. Refer to the following article for more information on the skeleton system.
Interface
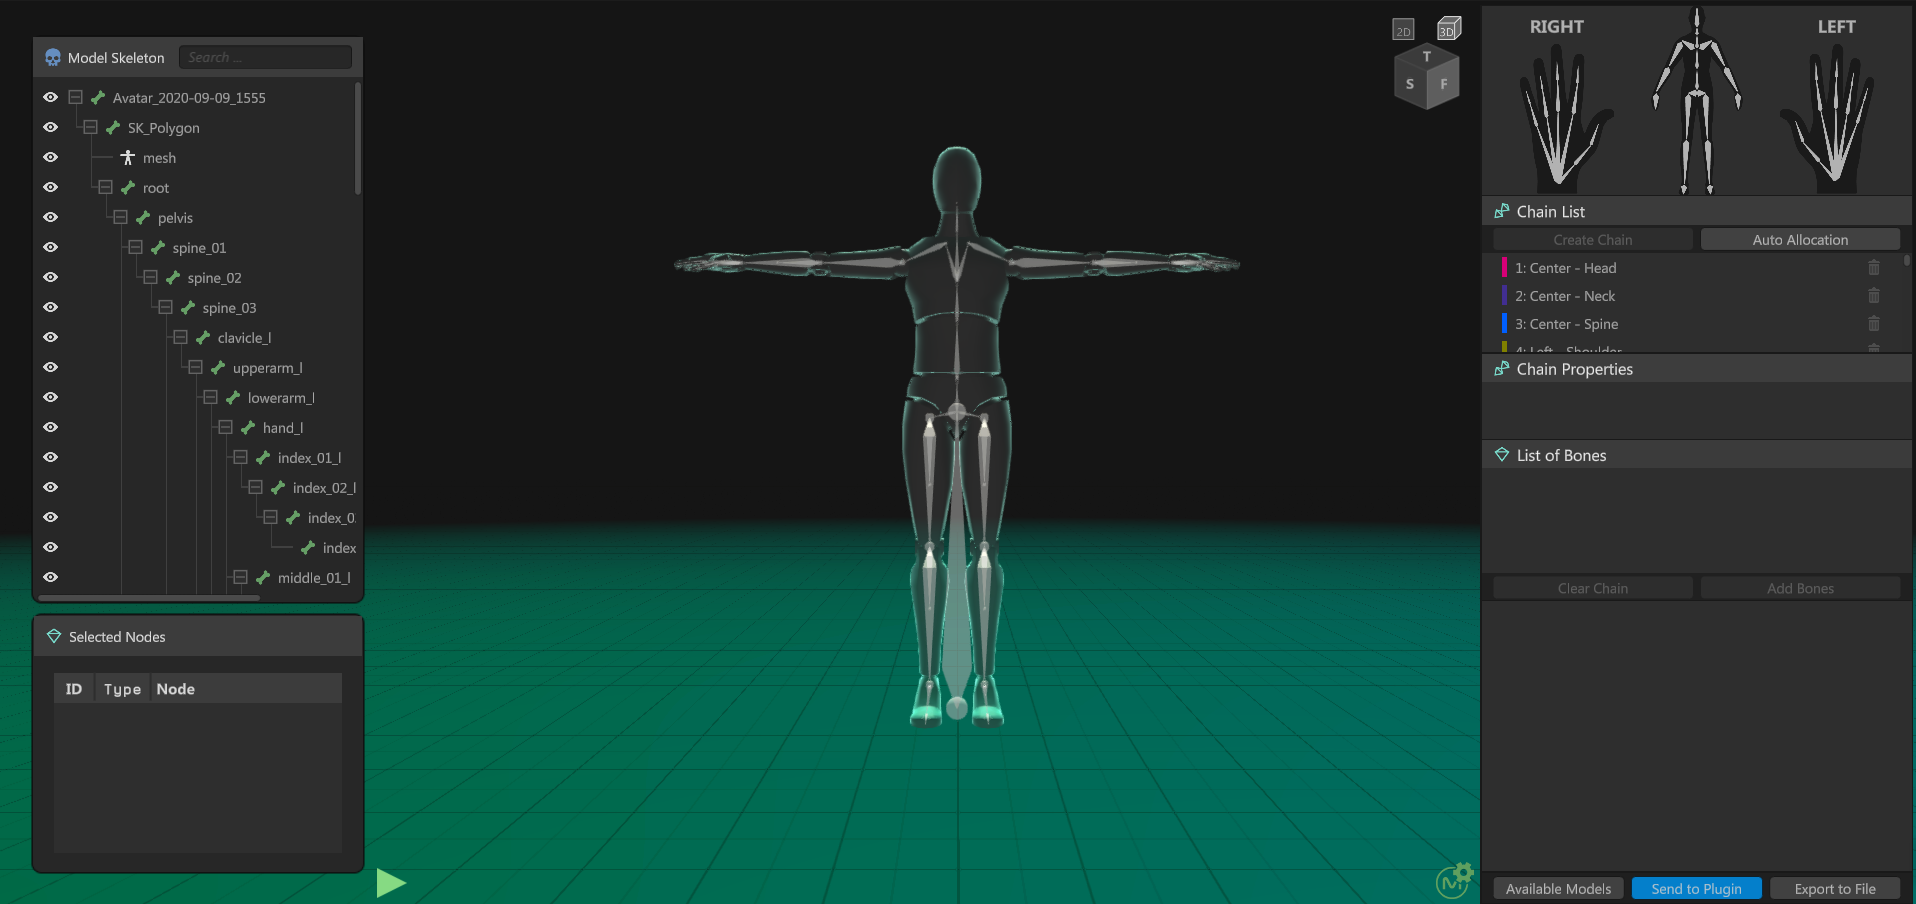
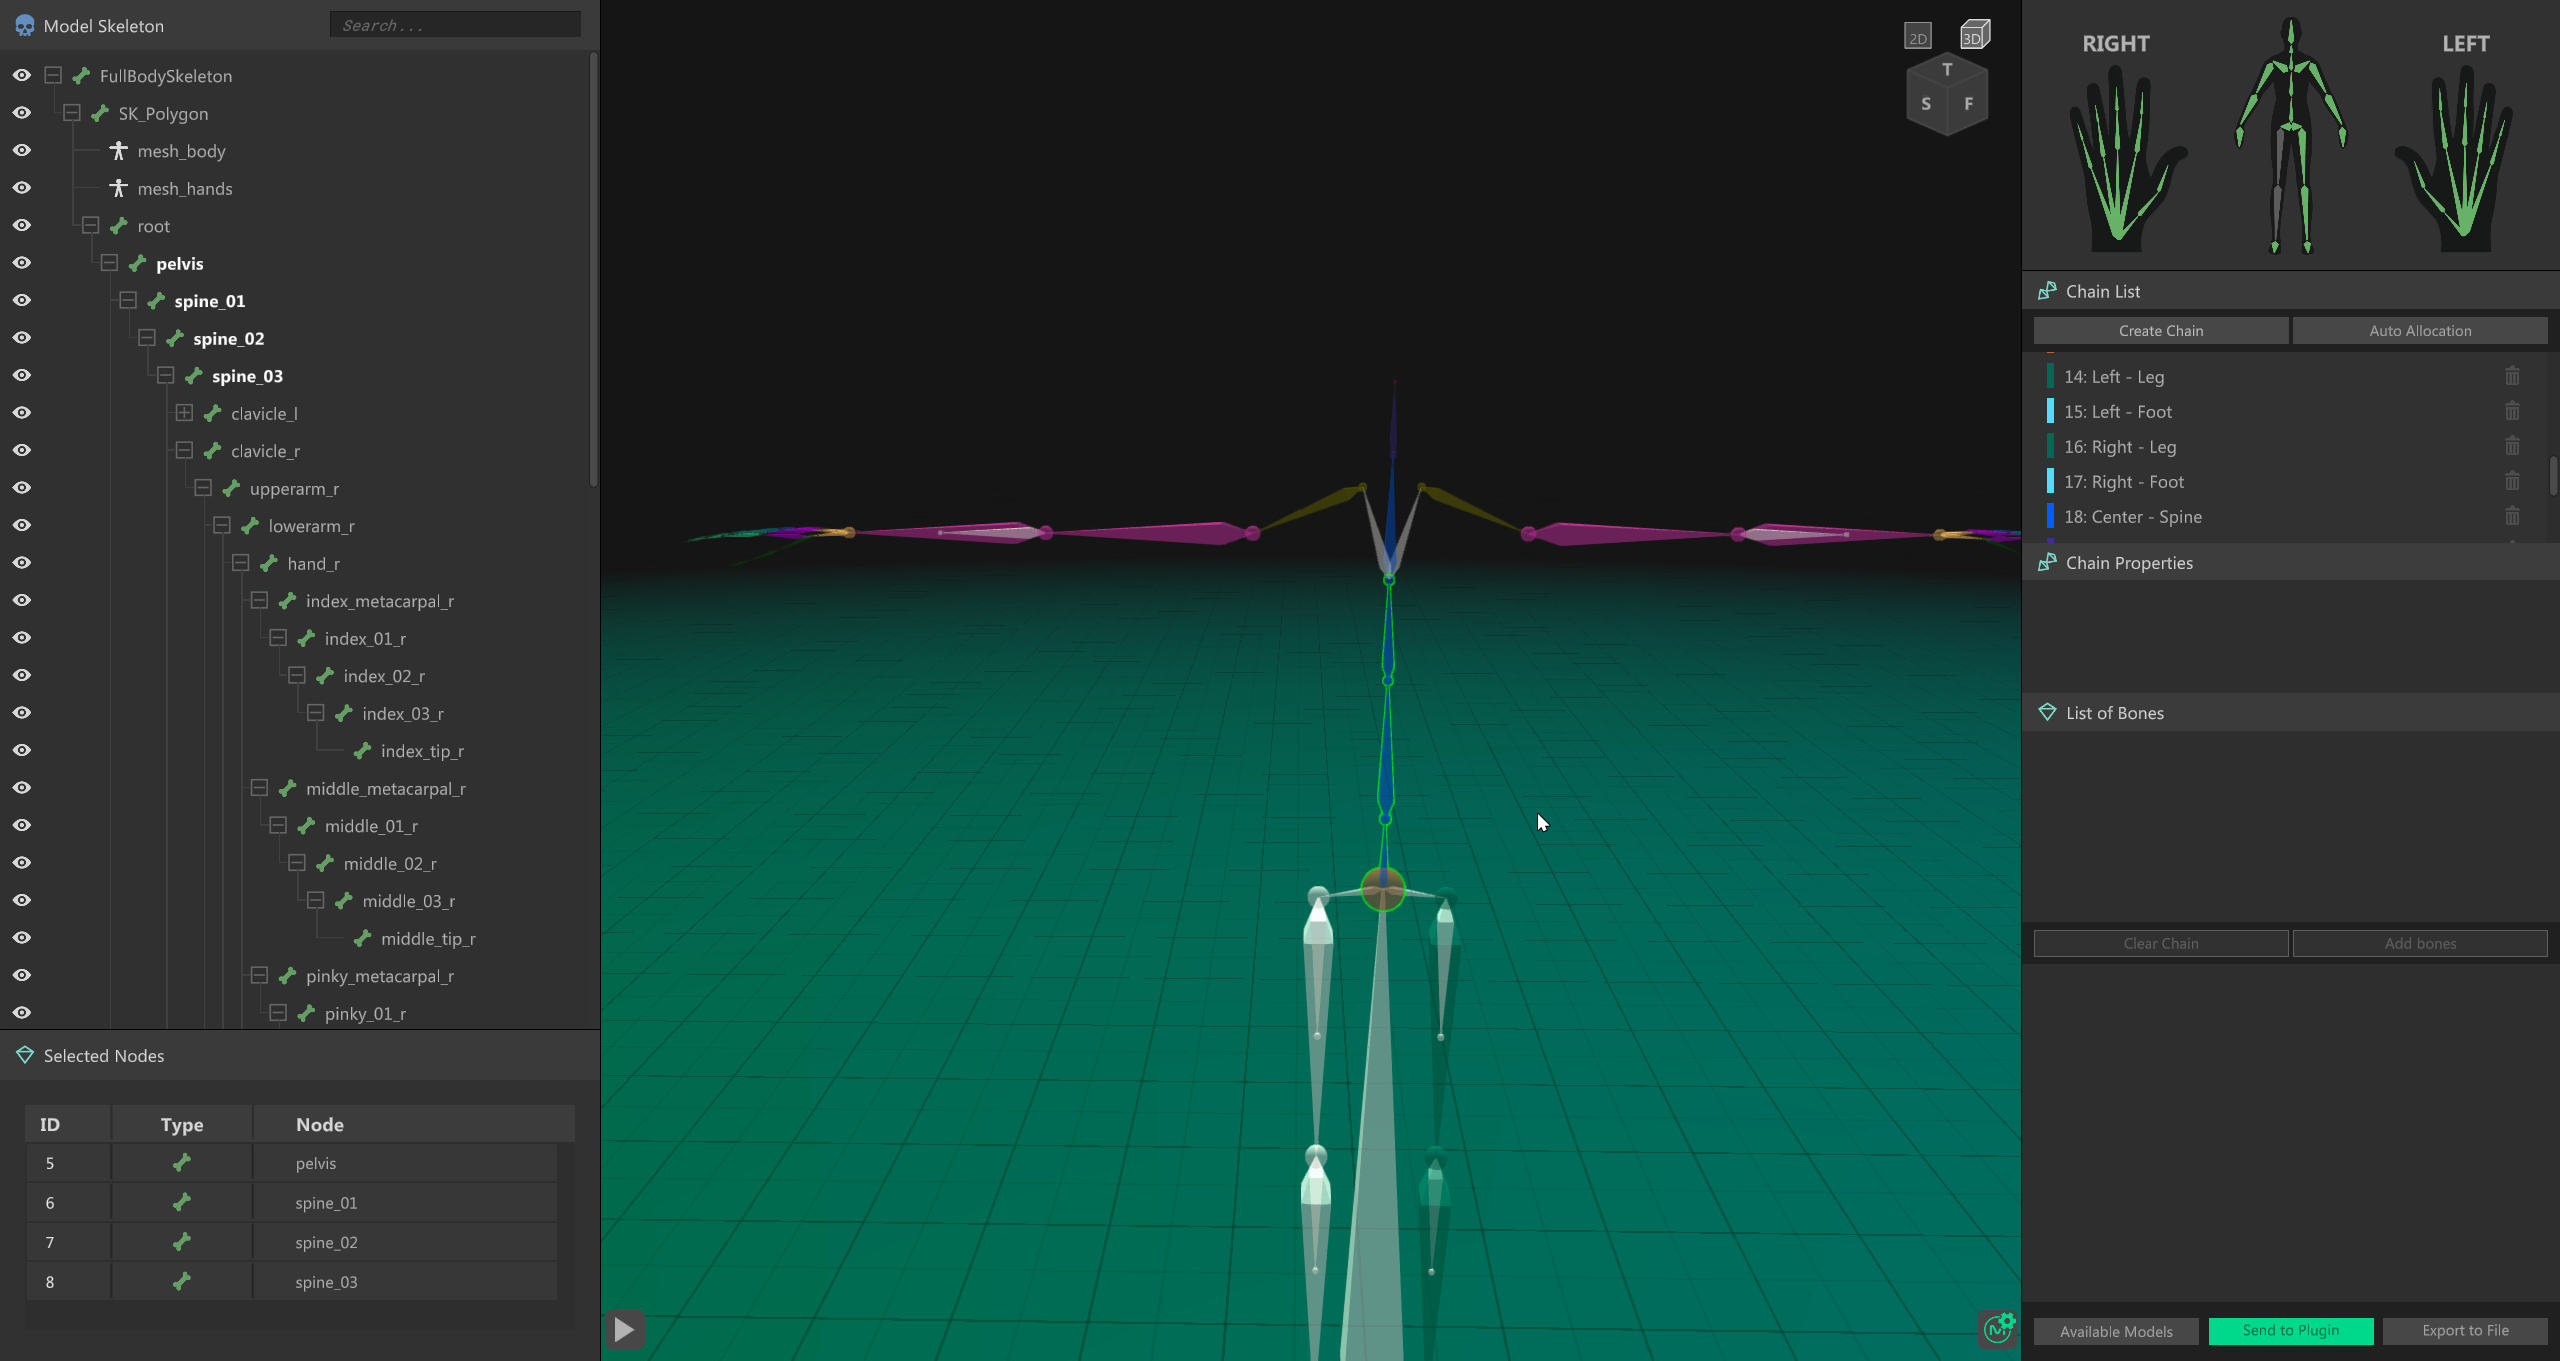
- Hierarchy On the left you can find the node hierarchy. Here all the bones are visualized as a hierarchical list.
- Status In the right top corner you will find the current skeleton status.
- Node selection Below that a list of the currently selected nodes.
- Chain list Below that the chain list.
- Viewport In the center you find the 3D viewport.
- Chain properties Below that the currently selected chain's properties.
Viewport
Controls
Controls are divided into two control groups. When holding the right mouse button you are able to freely fly around. The key bindings are described below.
| Input (Regular) | Action |
|---|---|
RMB |
Look around |
MMB |
Pan |
ALT + LMB |
Orbit |
Mouse scroll |
Zoom |
ALT + RMB |
Zoom |
F |
Focus on selected nodes |
Hold RMB |
Free fly mode |
| Input (Freefly) | Action |
|---|---|
W |
Forward |
S |
Backward |
A |
Left |
D |
Right |
Q |
Up |
E |
Down |
Presets
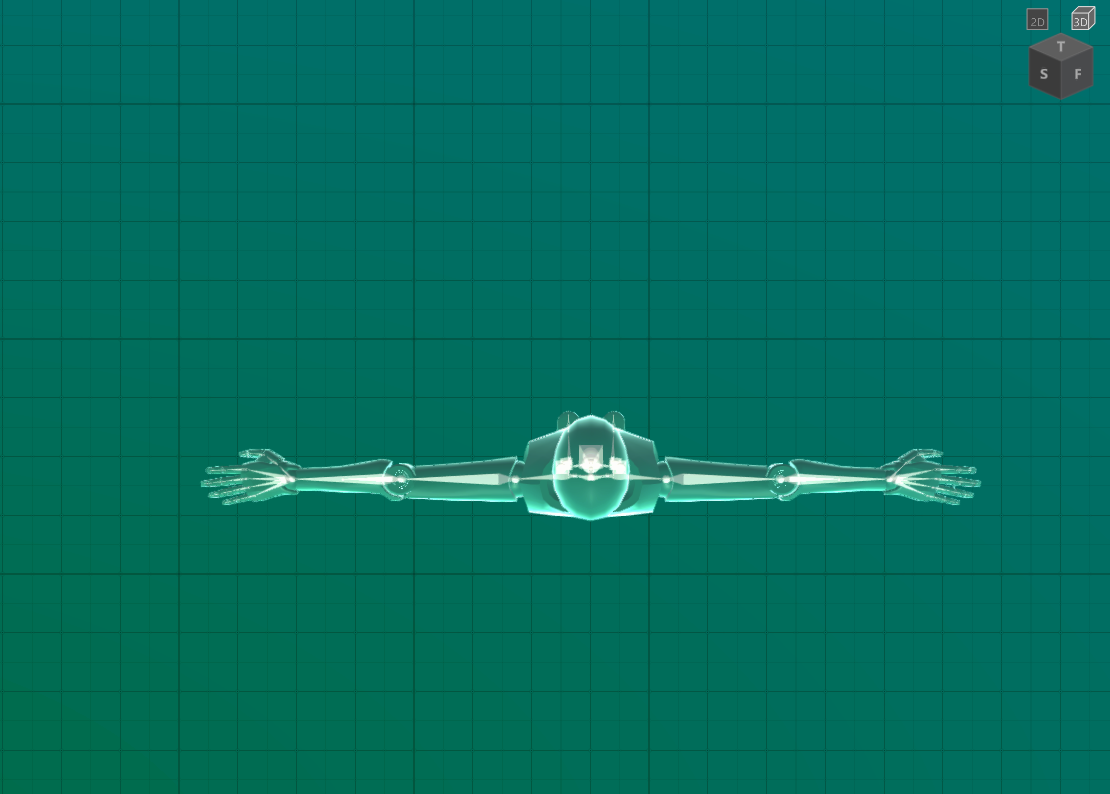
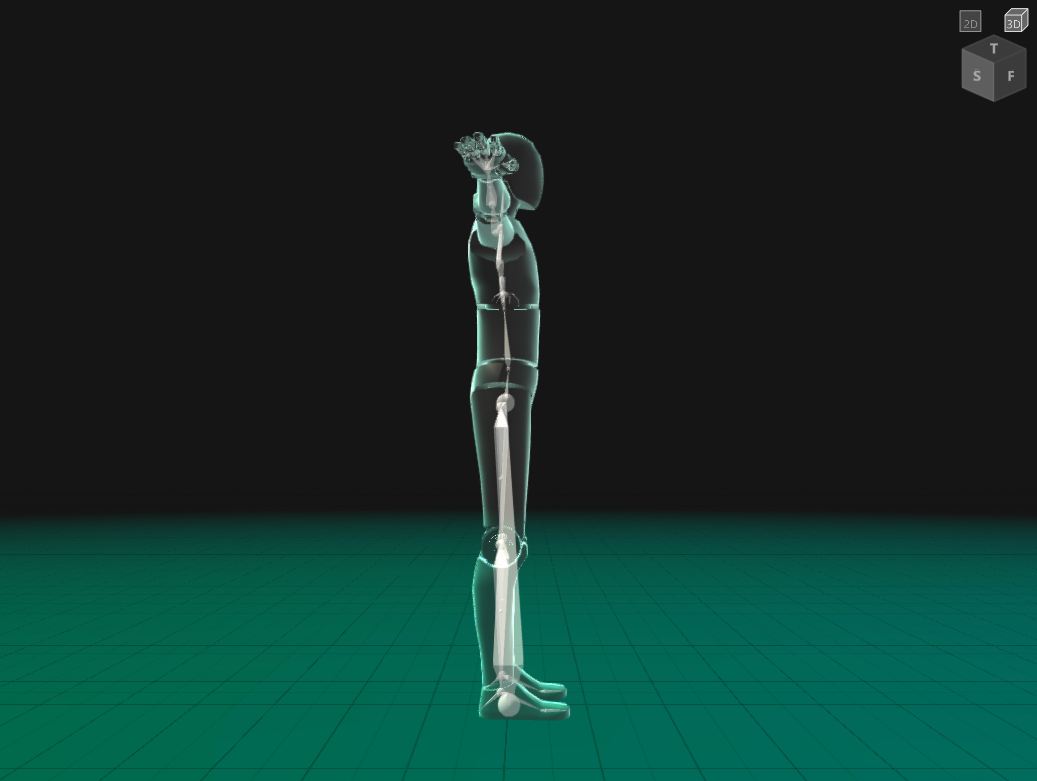
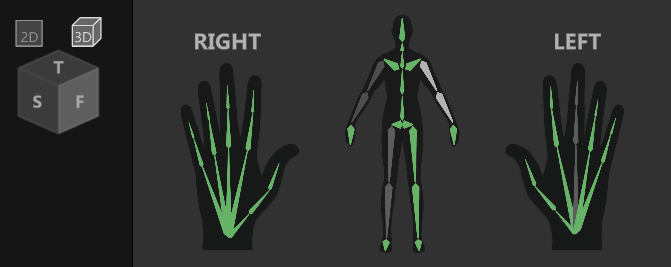
You can switch between different viewport presets using the control cube in the right top corner of the viewport. The 2D and 3D buttons switch between perspective and orthographic camera modes. And the T (top), F (front) and S (side) buttons switch between their respective camera positions.
Hierarchy Panel
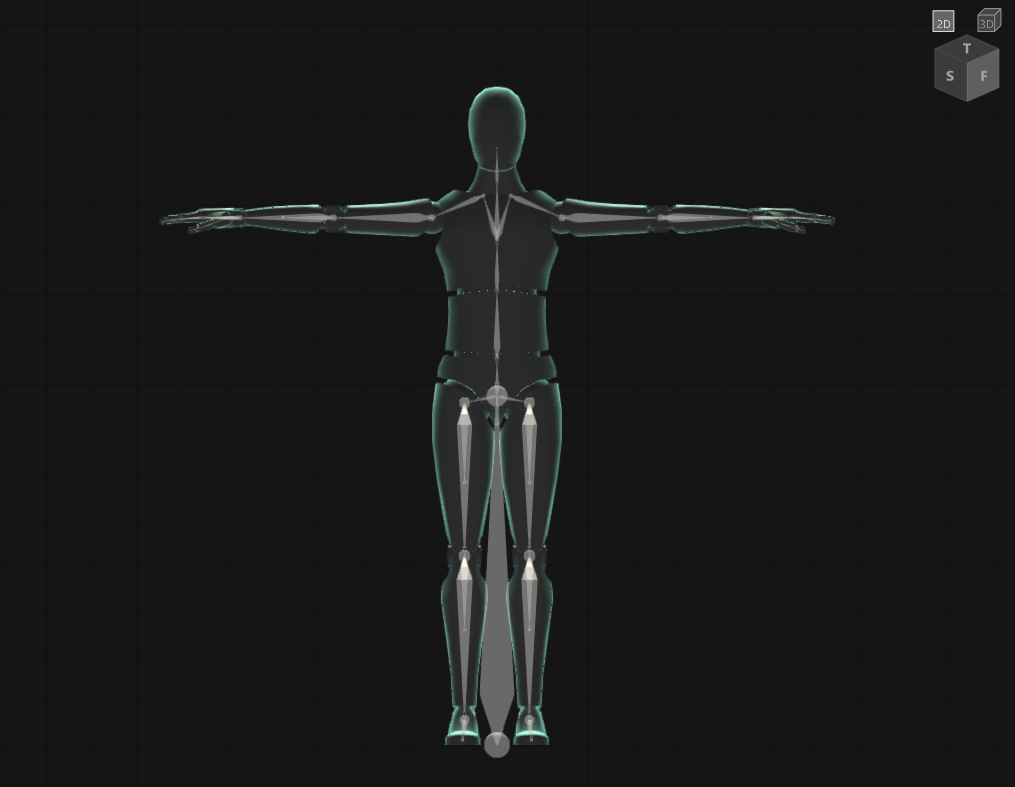
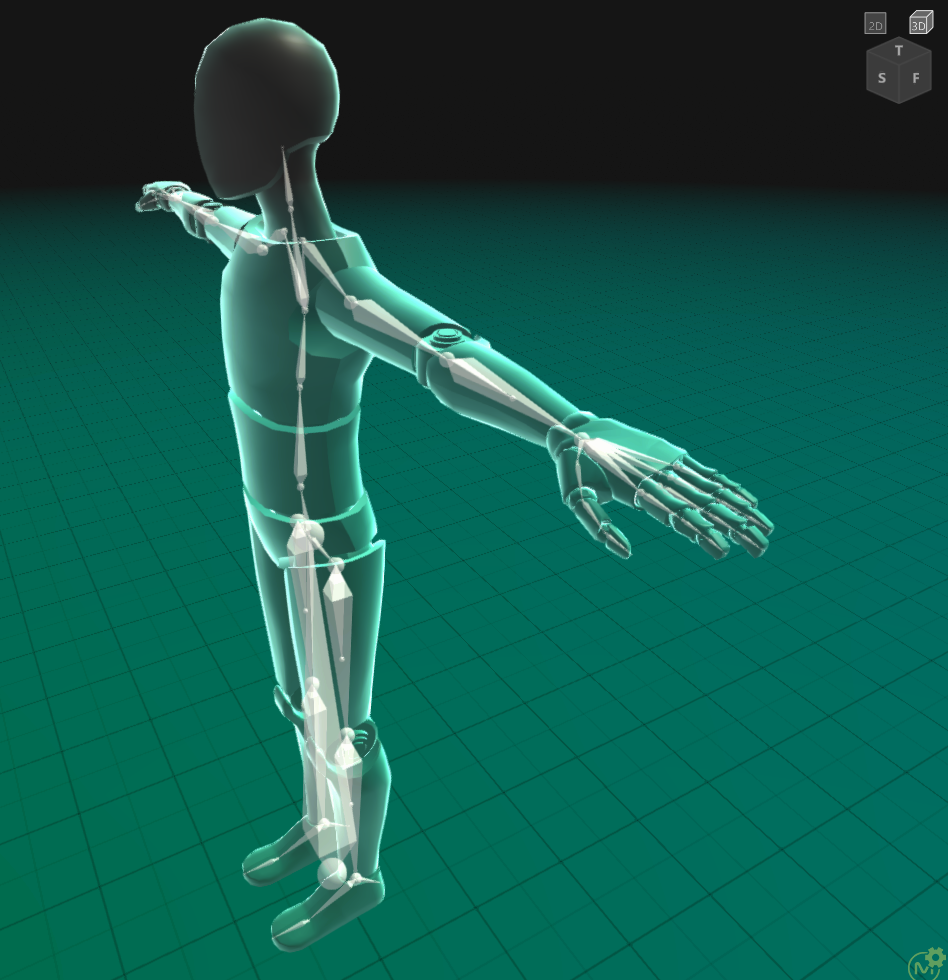
The Hierarchy panel shows the models' node hierarchy. Each node can be selected, collapsed/expanded. Their visibility in the viewport can be toggled using the eye icon. On top there is also search box to quickly traverse the hierarchy. Every selected node is also highlighted on the skeleton in the main view and highlighted within the hierarchy view.
Node Selection
Selecting nodes can be done by clicking on node in the Hierarchy panel or directly on the skeleton. Selecting a bone will select it's two corresponding nodes and selecting the node will just select the node.
When selecting nodes the following shortcuts can be used to speed up the process.
| Select Node | Action |
|---|---|
LMB |
Selects one Node |
Shift + LMB |
Selects from the last selected Node to the selected Node |
CTRL + LMB |
Adds the currently selected Node to the selection |
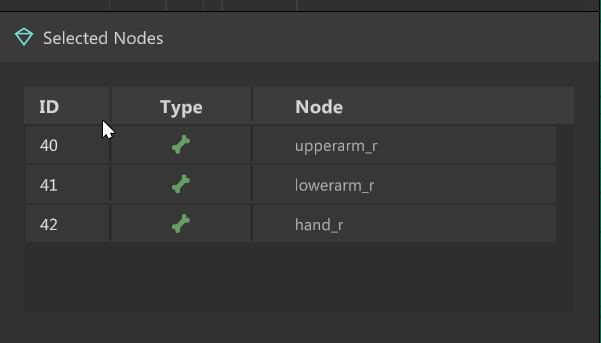
In the selected nodes menu a list of the currently selected nodes is shown with it's ID and Type.
Status
The status view shows you the current status and availability of chains.
Greensignify a correctly configured chain.Whitemeans the chain is present however it has no nodes.Dark graymeans there is no chain currently present of that type.
Chain list
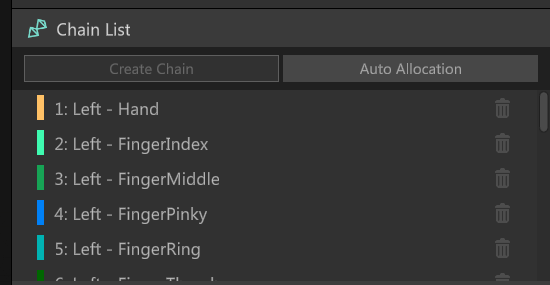
The chain list shows a list of all currently created chains. The Create Chain button only lights up when a node is selected and will create a chain containing the currently selected nodes. The Auto Allocation button will attempt to automate the process, to learn more about the auto allocation please refer to the following chapter.
Chain properties
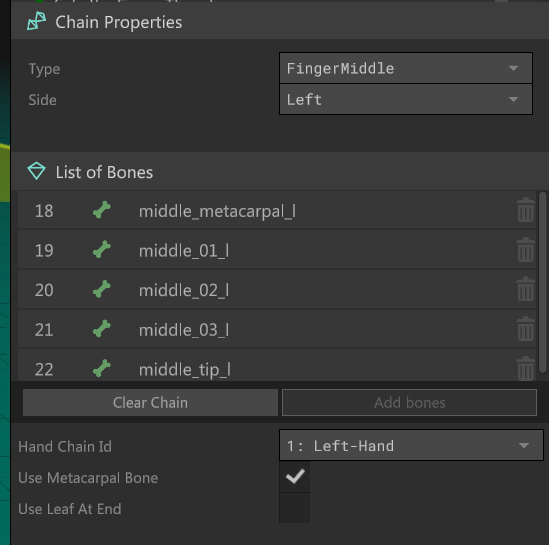
The chain properties window shows you the properties of the currently selected chain. It's chain type, the side if there is one to that chain. A list of all the nodes currently assigned to that chain. And the chain settings, these are specific for each chain type. Please refer to the skeleton article for more information on these settings.
Opening the application
There are three common ways to open the application.
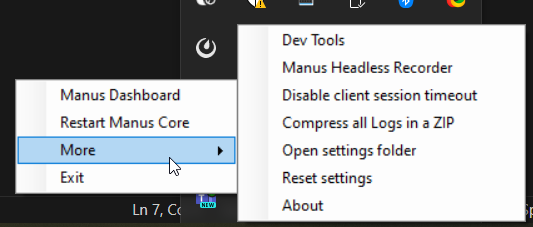
-
When right clicking the MANUS Core tray icon, you navigate to
Moreand selectDev Tools. -
Opening a
msklfile will open the DevTools and load the skeleton. -
The app opens automatically when sending a skeleton to DevTools from the plugins or when opening a
msklfile.
Connection
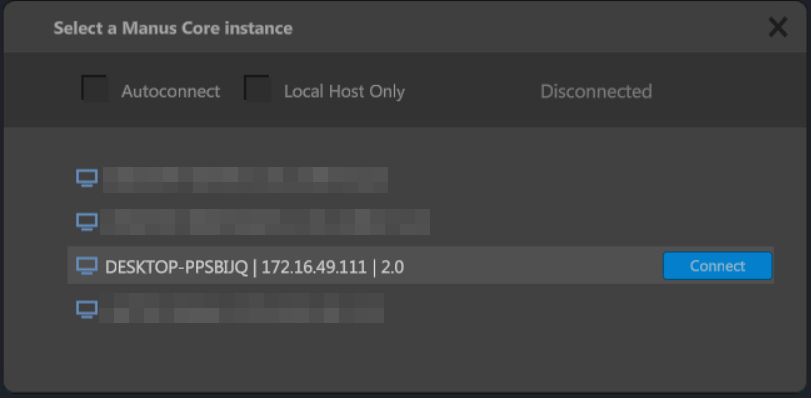 For the DevTools to function an active connection to MANUS Core is required. When the application opens, it will automatically search and try to connect to a MANUS Core instance. If not successful, the Core Selector Panel will open automatically letting you pick which MANUS Core instance you want to connect to manually.
The icon in the right bottom corner will be green when connected and red when not connected to MANUS Core.

Setting up your skeleton
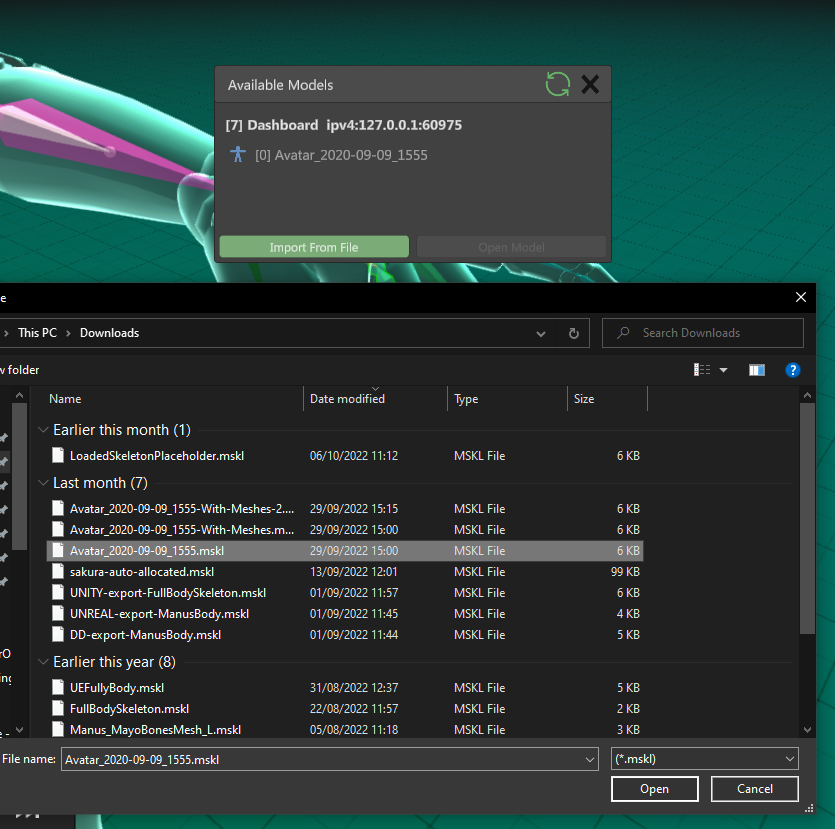
If a model was sent to the tool through the Unity and Unreal plugins, the application will automatically attempt to load it. You can also click the button Available Models to load an mskl file or switch between previously loaded skeletons.
A popup panel opens with a list of active sessions and the models available. You can then either select a model or click Open Model to load a previously saved mskl file from your file system.
Creating Chains/Adding Bones
Chains are collections of bones that have a relation to each other. For instance, the upper and lower leg bones form the leg chain. And all the bones that make up the spine together make the spine chain. More information is available in the chains article.
Setting up your skeleton for animation boils down to creating and defining all the neccessary chains. There are two ways to setup your skeleton. Manually assign all bones to chains until you have all required chains, or let the automatic allocation take care of it.
Automatic Allocation
During the automatic allocation, MANUS Core will attempt to assign the chains. After loading the model into the Dev Tools click Auto Allocation to start the process.
Skeletontype
Please make sure to properly set the Skeleton Type before sending your model to the Dev Tools (Hands / Body / Both).
Verify successful allocation using the animation system. If the skeleton animates correctly the allocation was likely successful.
If this is unsuccessful, it's likely the specific bone naming conventions and structure are not correctly identified. You'll have to manually assign the skeleton completely, or manually find errors and correct them. Misidentifications of chains (side, type) or incorrectly assigned nodes can both happen.
Manual creation
To create a chain manually you go through the following steps:
- Select the desired nodes to be included in the new chain. More info on node selection.
- Click the button
Create Chain. - Specify its
TypeandSide. For chains that don't have a side, selectcenter. - Configure the current Chain settings by setting the values in the displayed form. More info on chain settings.
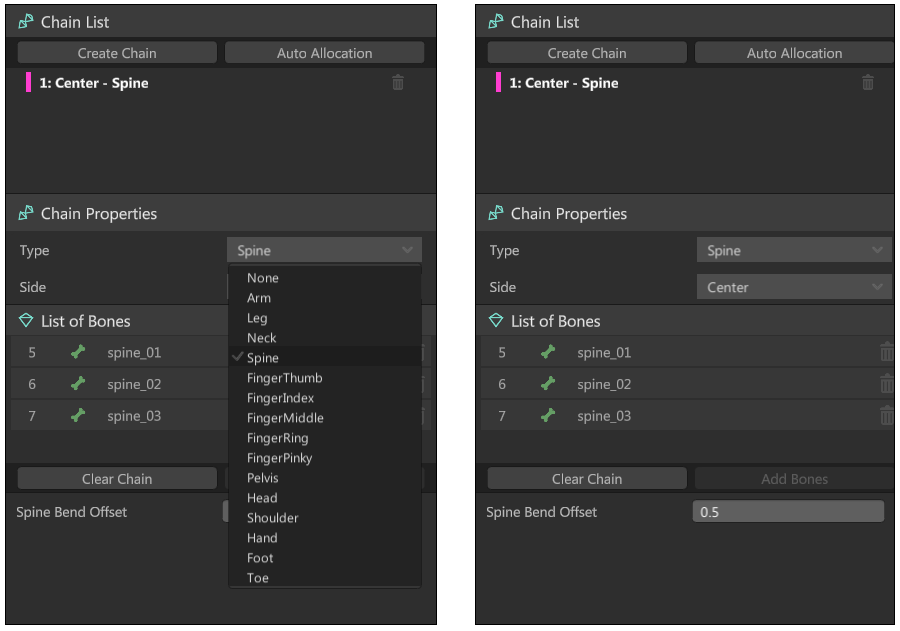
Adding Bones
Nodes can also be added after creation to existing chains.
- Select the existing chain where nodes should be added.
- Select the desired nodes to add to the chain.
- Click the
Add Bonesbutton.
Undo/Redo
All operations (excluding loading and saving a skeleton) can be undone or redone by pressing the key combination Ctrl + Z (Undo) or Ctrl + Y (Redo).
Preview Animation
It's possible to test a skeleton setup by having it animate through Core. There is a animation dialog in the left bottom corner of the viewport. Select one of the preview animations from the dropdown and press play. Changes can not be made to the chain assignment whilst the preview animation is playing, so close the dialog when making changes.
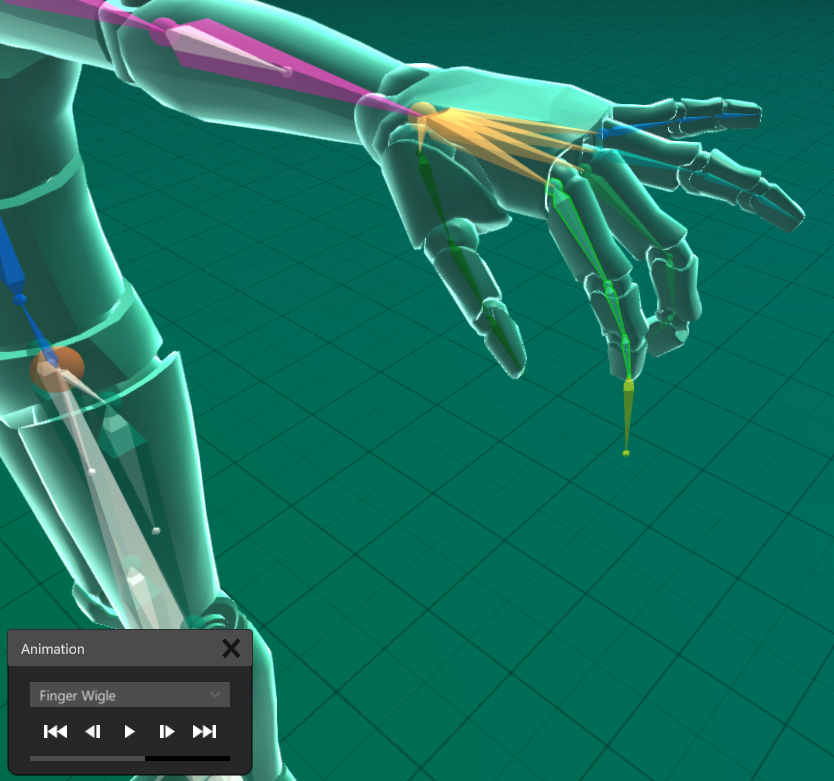
Animation
If the skeleton does not animate (correctly). The chain assignment is likely incorrect or missing essential chains.
Saving a Skeleton
The skeleton definition can be exported using two methods. Either send it back to the plugin when the model was initially sent from the plugin or save the file as an mskl file.
Note
If the connection to MANUS Core was severed at some point during the editing process, either in the plugin or in DevTools, it's very likely that you are not able to send the skeleton back to the plugin. In this situation it's advised to save the skeleton manually and import the mskl file into the plugin.
- Send to Plugin: This will send the skeleton back to the plugin that was used to send the skeleton to the DevTools.
- Export to File: This will save the skeleton onto the local file system using the
msklfile format, this file can be later loaded back into Manus DevTools or directly into the plugins.
